Good Monday morning! My project today was made for the Splitcoaststampers Inspiration Challenge. Our inspiration site was Artful Whimsy and I was inspired by this Vintage Molded Frame with Roses.

Here is what I came up with.
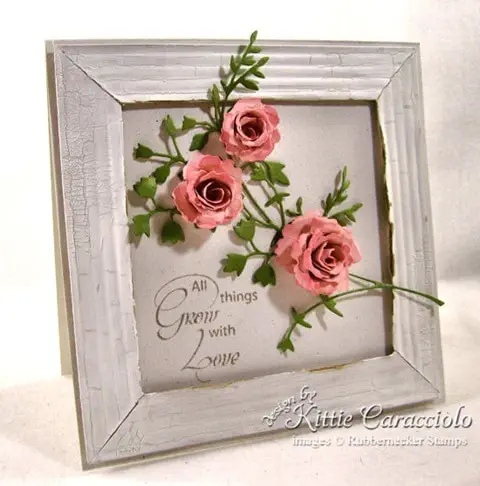
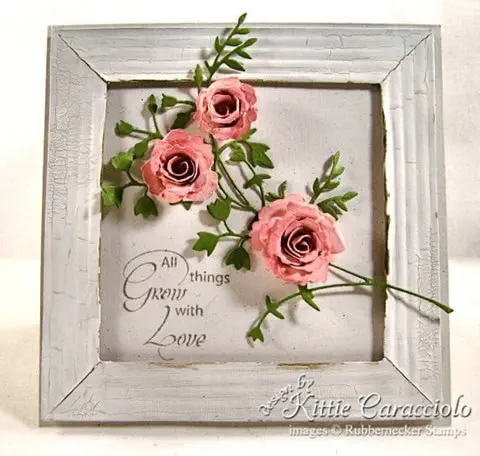
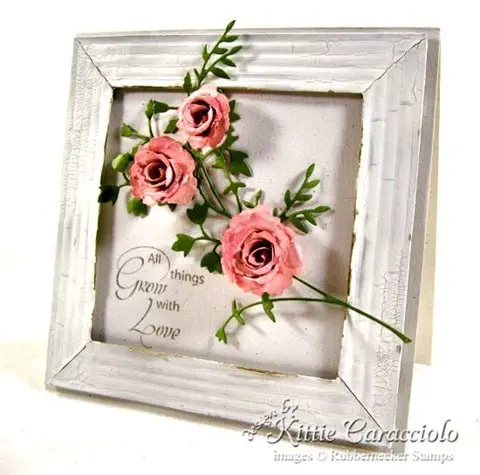
I loved the vintage frame and decided to make one of my own. I die cut a frame using kraft cardstock and with the 5" Spellbinders Grand Calibur square. I then cut a 3.5" square opening with the classic square. I marked the back of the frame and numbered each section so I would be able to match them back together exactly the way they were cut. I cut the frame into four pieces from corner to corner so I could create the mitered corners like the inspiration piece. I then crimped each piece to create the molded wood look and attached the four pieces back together. I cut four corners off the 3.5" square left over from the frame cut out and reinforced each corner on the back of the frame to hold them in place. I then painted the frame with Picket Fence Distress Crackle Paint, heat dried and then sanded a bit with a sanding block to rough up the edges and mitered corners.
I created roses using the My Favorite Things Royal Rolled Rose., I made one the full size and cut about 1/3rd of the other two rolls off to create smaller roses. I sponged the pink die cut roses with Spun Sugar Distress Ink to add some definition and color. I rolled and assembled the flowers around needle nose pliers and secured using glue dots. I used the pliers to bend back all the petals of the roses to give a more natural look and finished by sponging a tiny bit more pink ink to add a little more depth. I die cut two pieces of the Memory Box Honeyblossom Sprig to use as the foliage with the roses. I stamped the Grow With Love sentiment on the corner of the card base and attached the frame with mounting tape. I attached one of the sprigs above the sentiment with glossy accents and then attached the three roses. I cut the second sprig apart to add pieces of foliage to fill in around the roses.
I hope you enjoyed seeing my vintage frame. Let me know if you are interested in a tutorial on how to make the frame. It wasn’t hard and was lots of fun.
Stamps: Rubbernecker 2012 Sentiment #1 Grow With Love 627-01
Ink: Distress Ink Spun Sugar, Pumice Stone
Paper: SU Confetti White, Papertrey Sweet Blush, Old Olive, Kraft
Accessories: Memory Box Honeyblossom Sprig , My Favorite Things Royal Rolled Rose, Spellbinders Grand Calibur and Classic Square, Mounting Tape, Distress Crackle Paint Picket Fence, Glossy Accents, Needle Nose Pliers, Tim Holtz Sanding Block


How can I begin to describe the depth of beauty your creation is to me? Adore the distressing all around it …. breathtaking 🙂
Kittie your vintage frame is brilliant with it’s crackled paint and mitered corners. You rocked that inspiration. Beautifully done!
Mooi gedaan ! Een heel goed idee.
Ik wou dat ik zo creatief was.
Groetjes van Marleen
WOW! That is Gorgeous. Very clever on how you made your frame. I learn something new everyday. Thank you
ColleenB.
This is beautiful and I would love to know how to make the frame!!
What a wonderful idea. The card turned out beautiful. I understand your written instructions, but a video would be great. I refer to your videos for alot of my projects inspired by you.
Your card using the photo as inspiration is beautiful. I really like how you show at the end of your presentation the items you have used to make your cards. A tutorial would be nice for seeing the steps in making the frame.
I am such a fan of your cards, and this one blows me away!! I LOVE it! I agree with everyone else that a tutorial would be great. Thanks so much for sharing your wonderful creativity and techniques with us!
Wow….Your frame turned out great….Would love a tutorial on it….The project is so lovely….
jaw dropping!! Gorgeous!
HUGS
Michelle
this is to die-for gorgeous! you are sooooooo creative!
UNBELIEVABLE!!!! You ideas are simply amazing Kittie. You must lay awake at nights thinking what to do next? I would have never thought that up? Keep it up…you inspire us with all your talent. This card is beautiful!
(((Hugs)))) Leanne
спасибо за оригинальную работу.Я тоже хотела бы видеть учебник или даже, видео-урок!С удовольствием любуюсь Вашими работами!
WOW! this is gorgeous. a tutorial would be great. I am a visual learner, and love also to print your tutorials for later learning as I can re-read and underline and see the pictures. You would be surprised how much you have taught me. thank you, thank you, for sharing your talent, and inspiring us……lots of hugs
Keep it up Kittie……you inspire us with all your talent. This card is beautiful! I think you are sooooo talented!
Great idea for the frame. I would love to see a tutorial on how it was made
Beautiful card!
wow, I cannot believe that you made this frame. gorgeous gorgeous!! and the whole ensemble is so professional and beautiful. all your work is amazing.
Would love for you to show me how you made this frame it is amazing how real it look. Thanks for all you do
Yes, a tutorial please. This idea is so original using paper to imitate a beautiful picture, love this.